The purpose of this guide is to very briefly explain and in general terms only, how a standard EWI system is installed.
It should be noted that each manufacturer’s EWI system is slightly different and therefore installation procedures will vary and will be specified accordingly. This guide purely explains the general installation steps and is non-specific.
Preparation For External Wall Insulation
Depending on whether the specified EWI system is to be dry-fixed only or to incorporate an additional adhesive fix the existing substrate should be checked, repaired as necessary, cleaned, dry and as dust free as possible.
It also needs to be cleaned of any substance which may affect the effectiveness of the adhesive and/or primed accordingly.
EWI Starter Track
A starter track is a U-shaped channel sized to match the thickness of the insulation boards so that they can slot in.

They’re typically made from PVC, aluminium or stainless steel and attached above DPC to provide a level for easy installation and to protect the base of the system.
 Adhesive Fix
Adhesive typically comes dry packed ready to be mixed with water on site. Once mixed the adhesive needs to be applied around the entire perimeter of each insulation board and typically additionally dot and dabbed with adhesive. Manufacturer’s instructions should be followed. The bards are then attached to the wall in a staggered bond taking care to interlink at the corners and follow instruction around openings to avoid any increased risk of cracking.
Boards should be properly aligned both vertically and horizontally and there should be no gaps greater than 2mm between boards.
Mechanical Fix
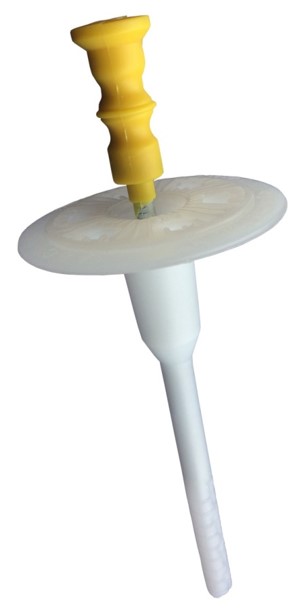 The exact fixing will be specified according to insulation type, thickness and substrate. They will typically be ether a nail fixing (masonry) or screw and are designed to pass through the insulation board and embed into the substrate at a depth enough to ensure the boards cannot de-bond.
Holes are drilled through the insulation boards and into the substrate at a thickness and to a depth as specified by the manufacturer and following a specific pattern. Typically, this will mean around 5 fixings per insulation board.
Levelling
The new insulation substrate should be smooth and level. Any uneven areas should be made good by rasping.
Beading
The façade can now be prepared by adhesively fixing (using the reinforcing basecoat) and corner beads, base beads, movement beads etc as specified and required.
Reinforcing Basecoat
The reinforcing basecoat is dry packed for mixing with water on site. It is trowel applied, directly to the insulation boards, typically to a thickness of around 6mm and a fabric (fibre glass) reinforcing mesh is laid into it and trowelled in just below the surface.

Each strip pf mesh is overlapped by around 100mm with additional patches applied to corners of openings and at stress areas.
The Finish
Once the reinforcing basecoat is dry (usually up to 72 hours) it can then be prepared for the chosen finish. This may involve a straight forward primer followed by a thin coat render or it may involve an additional render coat to receive a dashing aggregate or to create a heavier texture or a brick / stone effect, a thick coat render or an adhesive to receive brick slips.
EWI Installation – Important Footnote
The manufacturer of each EWI system will produce and issue an installation guide which must be followed at all times.
It’s a hand applied product and so absolute perfection doesn’t exist. However, all INCA system designers will fully train and card all their installers which is why it’s important that installation is only be carried out by such professionals. This is the quality you can expect by choosing an INCA member company.